
What is a 360° feedback assessment and what is it used for?
A 360° feedback assessment is a development-focused evaluation method in which an employee receives feedback from multiple perspectives: their manager, peers, direct reports, and sometimes even external collaborators or clients.
Unlike traditional evaluations that rely solely on the manager’s view, 360° feedback provides a more complete and balanced picture of how a person is perceived in their work environment.
This type of assessment is especially useful for:
– Identifying strengths and development areas.
– Raising self-awareness through the contrast between self-assessment and external feedback.
– Designing personalized development plans based on real perceptions from different roles.
In Panorama, the 360° tool allows you to configure and automate this entire process in a structured, efficient, and user-friendly way.
1. Define the variables in the assessment model
Access the assessment model and create the variables you plan to use in the 360° feedback process. Link each variable to the 360° tool and configure the connection by assigning the specific items (questions) that will be included in the evaluation form.
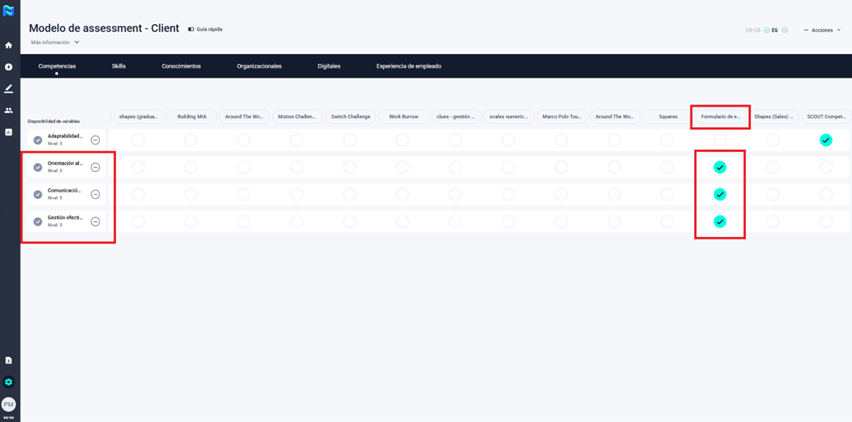
2. Set up the evaluation form
For each variable you plan to assess in your 360° project, assign an appropriate evaluation form. You can either reuse existing forms available in the platform (such as those from SCOUT) or create new ones directly from the assessment model. Ensure that each form is aligned with the specific behaviors or competencies you intend to evaluate.
3. Create the project
To create the project, go to the “Projects” section and click the “+” button. Enter a name and a brief description, then click “Save.”
You can also add a start and end date for the project, although these dates are purely informational and only visible to the project administrator.
4. Configure the project and evaluation matrix
To start configuring the project, open it and click on the “Settings” button.
From there, set up the evaluation matrix by adding the variables that will be assessed and selecting the 360° tool. Then, link them by crossing each variable with the tool to ensure proper configuration.
5. Configure the 360° tool
Once the 360° tool has been linked to your project, click on it to begin the configuration. You’ll find several key sections that should be completed carefully:
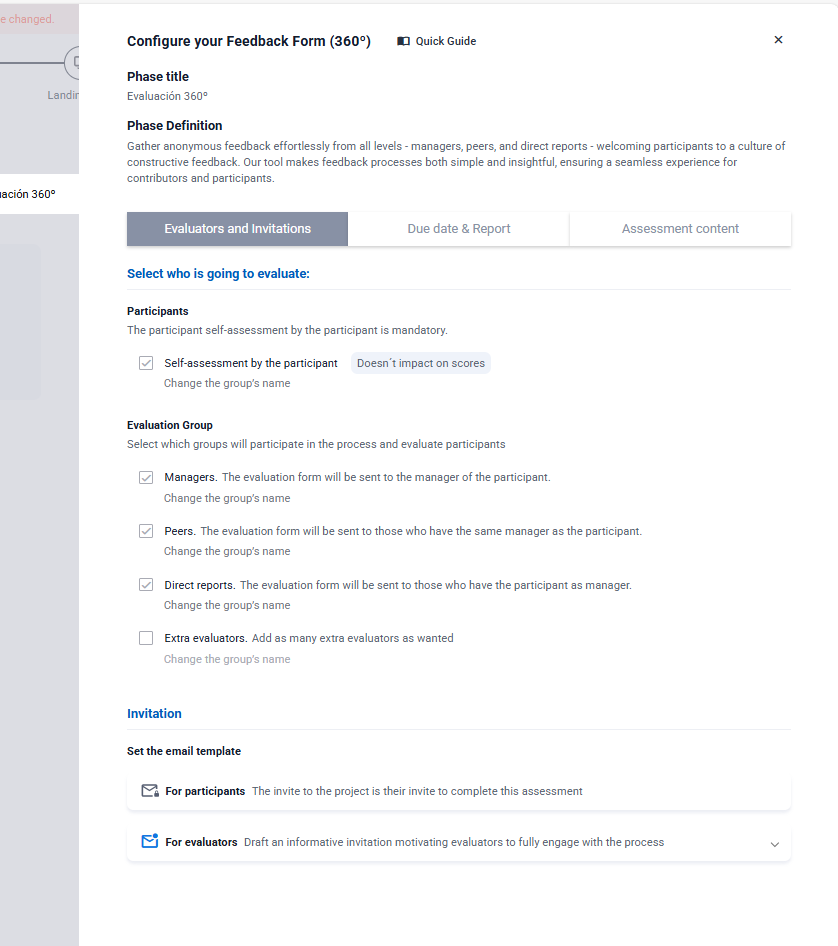
• Evaluators and invitations
Define which evaluator groups will participate in the process (Managers, Peers, Direct Reports, Additional Evaluators). You can customize the name of each group to better fit your company’s internal language or structure.
Keep in mind that self-assessment is mandatory, although it will not be included in the final score.
Next, choose the email template that evaluators will receive. Panorama provides a default version, but you can edit and tailor it to match your organization’s tone.
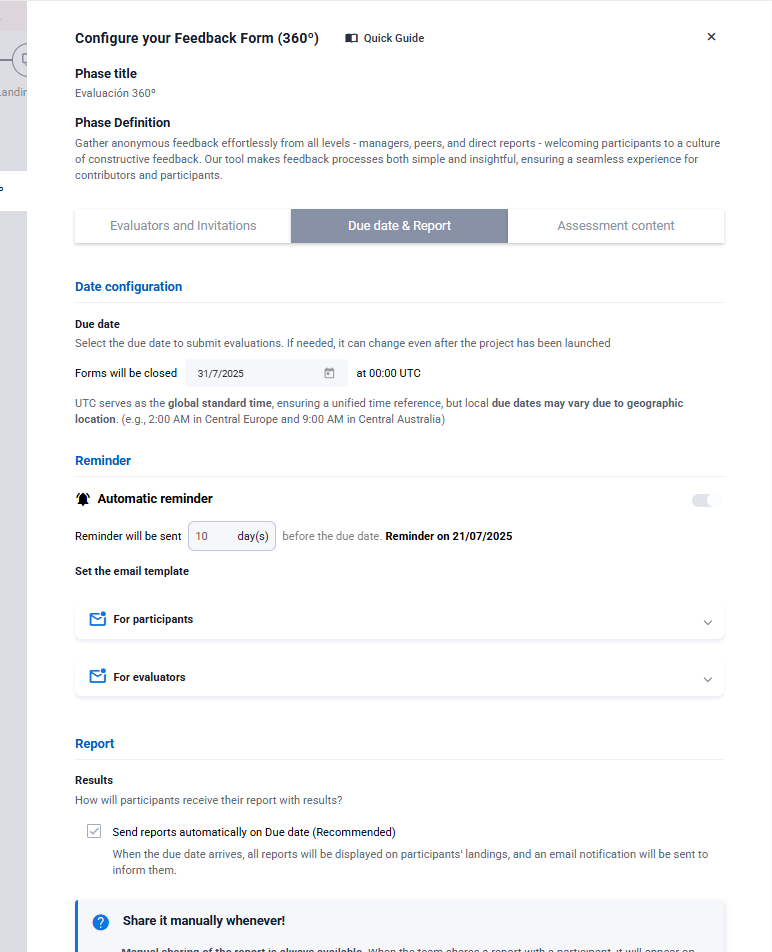
• Due date and report
Set a deadline for completing the evaluations. This date can be modified at any point during the process.
You can activate automatic reminders for both participants and evaluator groups. Panorama includes editable templates for these reminders.
Decide whether participants will automatically receive their feedback report once the process ends. If so, you’ll also need to configure the email that notifies them and provides access to their 360° results.
• Assessment content
For each variable, select the questions that will be included in the evaluation. All evaluator groups — including the participant — will respond to these questions.
Define the rating scale to be used and include short descriptions for each level, helping evaluators interpret and select their responses appropriately.
You can also add open-ended questions to collect qualitative feedback. These won’t affect the final score, and you can control which evaluator groups will see and respond to each one.

Once all sections are complete, your 360° tool configuration will be ready to go.
6. Add participants to the project
To add the individuals who will be evaluated, follow the same process used in other types of projects.
Go to the participant table view and click the “Add participants +” button located at the top right of the table.
If you’d like more details on how to do this, check out the dedicated post titled “Adding Participants.”
7. Set up relationships between participants and evaluator groups
This is one of the most important steps in configuring a 360° feedback project: assigning evaluators to each participant.
Before proceeding, make sure the project has been launched.
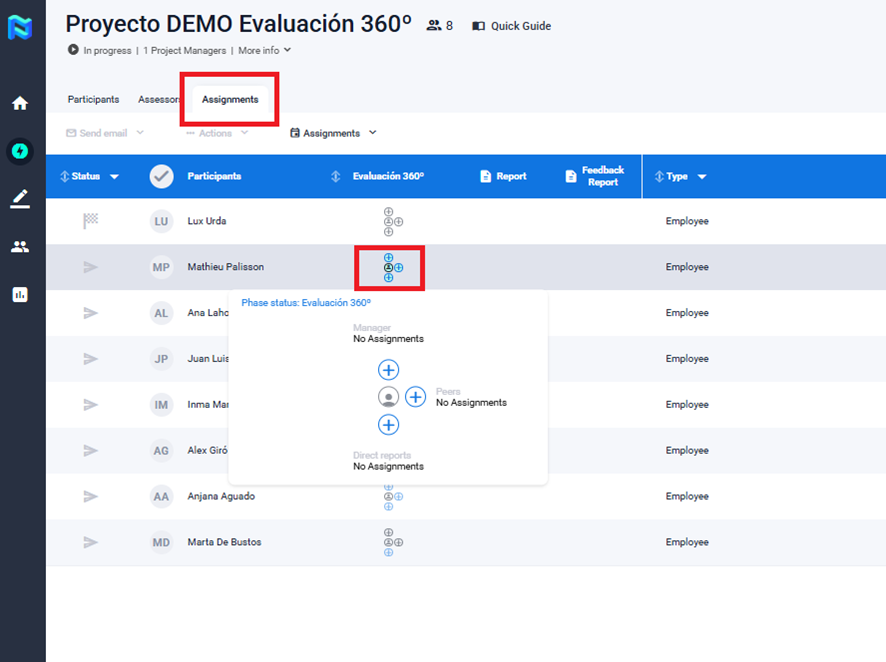
Then, go to the “Assignments” tab, where you’ll find two options for setting up relationships:
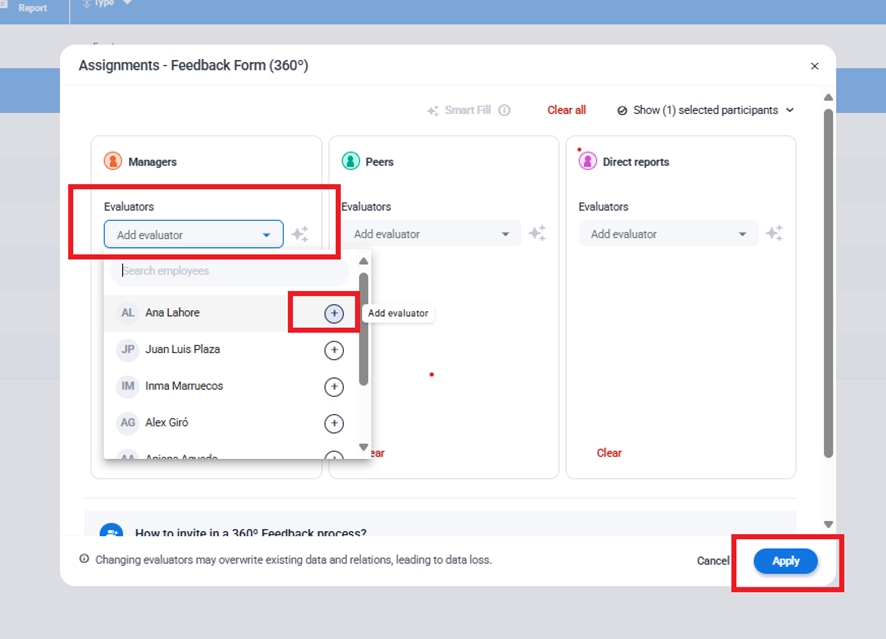
• Manual assignment
This method allows you to assign evaluators one by one.
Click the assignment icon located to the right of each participant. A new window will open where you can select evaluators by group (Manager, Peer, Direct Report, etc.).
Make sure all evaluators have already been added to the platform directory — otherwise, they won’t appear in the list.
Once finished, apply the changes to save the assignments.
In addition, you can use the Smart Fill feature, which makes the assignment process much faster.
Smart Fill automatically assigns evaluators to each participant, as long as all individuals involved in the 360° process already have a manager assigned in the directory.
The tool uses your company’s organizational chart to establish the relationships, so it’s important to keep it updated. You can build or edit the org chart by adding the appropriate manager to each participant’s profile in the directory.
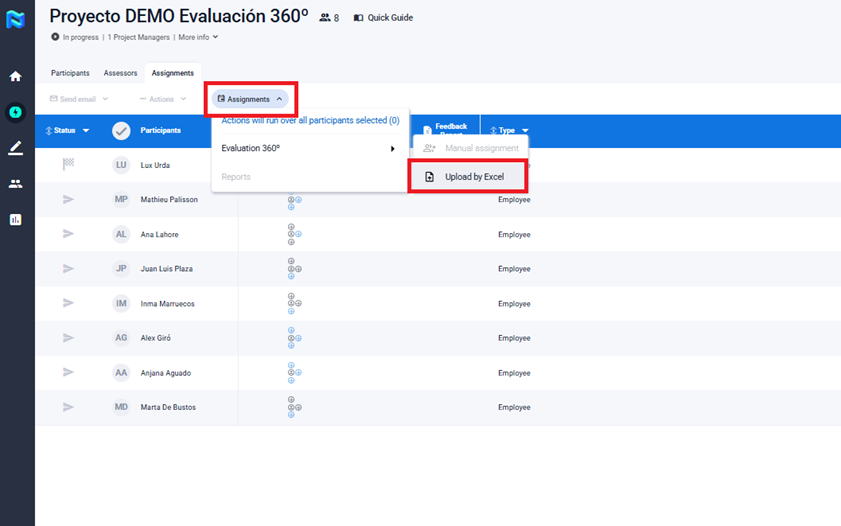
• Excel upload
This method is ideal for larger projects.
Click the “Assignments” button and then select “Upload by Excel.”
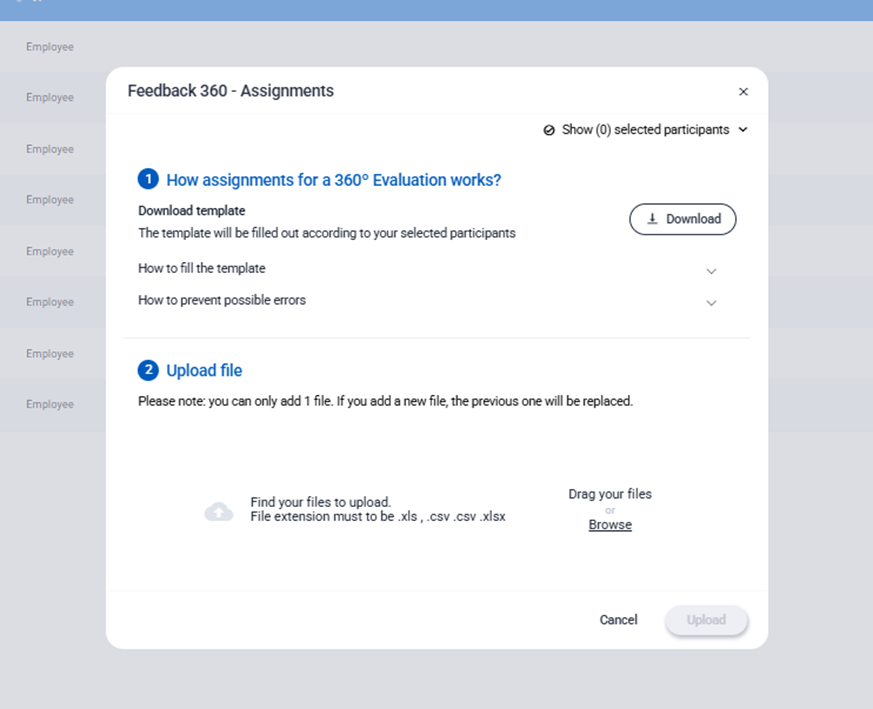
From there, download the template, which will include the participants already loaded into the project. The file contains several sheets:
- Sheets 1 & 2: Instructions and Valid Values
These explain how to properly complete the file and show the allowed evaluator relationship types for your project. - Sheet 3: Participants
A list of all participants selected for evaluation. You can use this sheet as a reference directory. - Sheet 4: 360° Feedback Relationships
Each row represents one evaluation. You must enter at least the email addresses of both the participant and the evaluator.
If relationships were previously created, they will also appear here.
Once the file is complete, return to the platform and upload the Excel file from the same screen to import all evaluator assignments.
8. Launch invitations
Once the configuration of the project, the 360° tool, and evaluator group assignments is complete, it’s time for the final step: launching the invitations.
When you do so, all participants will receive an email with access to their evaluation. At the same time, each evaluator group assigned to a participant will also receive their individual invitation to complete the corresponding feedback form.
From this point on, your 360° feedback process will be officially underway!